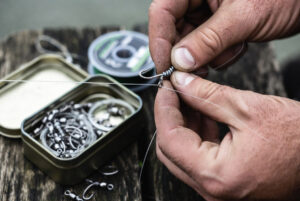
Walk through any carp fishing publication and you’ll find guides to 15 or 20 different knots, many of which you’ll never use. In reality, you need five knots tied consistently well to handle every situation in carp fishing. Master these five and you’ll never lose a fish to a knot failure.
The Knotless Knot — The Most Important Knot in Carp Fishing
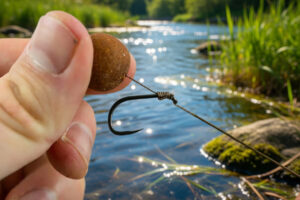
The knotless knot is used to attach a hook to a hooklink and set the hair length simultaneously. It’s the foundation of every carp rig that uses a hair.
How to Tie the Knotless Knot
- Cut your hooklink material to length. Tie a small loop at one end (the hair loop). Thread your hookbait stop through this loop
- Push the free end of the hooklink through the hook eye from the back of the hook, from the point side to the inside of the bend. Pull through so the hair loop hangs from the bend at the correct length (typically 2.5–4cm from the eye to the top of the hookbait)
- Hold the hair loop and hookbait in position at the bend. Begin wrapping the main hooklink material around the hook shank, working away from the bend toward the eye — making tight, close wraps that prevent slipping
- Make 6–8 wraps depending on hooklink material. Each wrap should lie snugly against the previous one
- Pass the tag end back through the hook eye from front to back (the same direction as the initial thread-through)
- Wet the knot thoroughly. Pull the tag end and the main hooklink simultaneously until the knot tightens fully and sits securely on the shank
The knotless knot is so named because the main hooklink has no traditional knot — the wraps generate friction that holds the hook. A correctly tied knotless knot with quality hooklink material to a quality hook will never be the weak point in your setup. Trim the tag end to approximately 3mm after tightening.
For how this knot is adapted for specific rigs, see our guides to the KD Rig, Blowback Rig, and Combi Rig.
The Palomar Knot — For Swivels, Clips, and Leader Rings
The Palomar knot is used to attach swivels, lead clips, rings, and line-to-line connections where a looped entry is possible. It’s one of the strongest knots available, retaining over 90% of line breaking strain when tied correctly.
How to Tie the Palomar Knot
- Double 15–20cm of line to form a loop
- Thread the doubled loop through the ring or swivel eye
- Tie a simple overhand knot in the doubled line — just a single wrap, don’t overtighten yet
- Pass the large loop over the swivel or ring completely
- Wet the knot. Pull both the main line and the tag end simultaneously until the knot tightens against the eye
- Trim the tag end to 3mm
The Figure-of-Eight Loop Knot — For Quick-Change Hooklinks
The figure-of-eight loop creates a strong, reliable loop at the end of a hooklink or leader that can clip onto swivels and quick-change links. It’s the standard “clip-in, clip-out” connection used on most ready-tied carp hooklinks.
How to Tie the Figure-of-Eight Loop
- Double 5–6cm of line at the end to form a loop
- With the doubled section, make a figure-of-eight shape — cross the loop over itself once, then once more in the opposite direction
- Pass the end of the doubled section (the loop) back through the first opening in the figure-of-eight
- Wet and pull the main line and loop simultaneously until the knot tightens into a small, neat loop
Loop size should be approximately 4–6mm — large enough to clip onto a size 8 swivel easily, small enough to clip securely. This knot is used at the top of almost every carp hooklink to connect to the lead system.
The Grinner Knot (Uni Knot) — For Swivels on Monofilament
The grinner (also called the uni knot) is the standard knot for attaching swivels and rings to monofilament mainline or leaders where the Palomar is not practical.
- Thread the line through the swivel eye and leave a 20cm tag end
- Fold the tag end back to form a loop alongside the main line
- Wind the tag end around both the main line and the loop 5–6 times, working away from the swivel
- Pass the tag end through the loop
- Wet the knot and pull the tag end to form the grinner, then slide it toward the swivel eye by pulling the main line
- Pull tight. Trim the tag end
The Blood Knot — For Line-to-Line Joining
Used for joining two lines of similar diameter — particularly useful when attaching a fluorocarbon leader to a monofilament mainline.
- Overlap the two lines by 20cm, running parallel
- Wind the first tag end around the second line 5 times, then pass it back between the two lines in the centre of the wrap
- Repeat with the second tag end — wind it around the first line 5 times in the opposite direction, pass through the centre
- Wet both wraps thoroughly. Pull both main lines simultaneously until both sets of wraps tighten against each other in the centre
Knot Quality Checklist
- Always wet before tightening — friction heat generated by dry knot tightening weakens line significantly. Wetting eliminates this
- Tighten smoothly and steadily — a rapid yank distorts the knot geometry. Pull with steady, even pressure
- Test every knot — after tying, apply firm hand pressure to the knot (not enough to risk snapping, just firm) before trusting it on the bank. A poorly tied knot will give way under hand pressure before it fails on a fish
- Trim tag ends to 2–3mm — a long tag end can catch on debris and pull the knot undone during the cast or on the lakebed
For the rigs that use these knots, see our complete carp rig guide. For the terminal tackle components these knots connect, see our guides to swivels and clips and leads and weights.
Last Updated on June 11, 2026 by Shane
I have made a lot of mistakes during my fishing sessions and don't want you to make the same mistakes. I've learned the hard way over 20 years of fishing most weekends, testing, tweaking, and testing again and now want to help you excel with your carp fishing.
If you need any help, you can reach me at Fishing Again's Facebook page