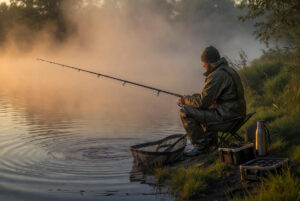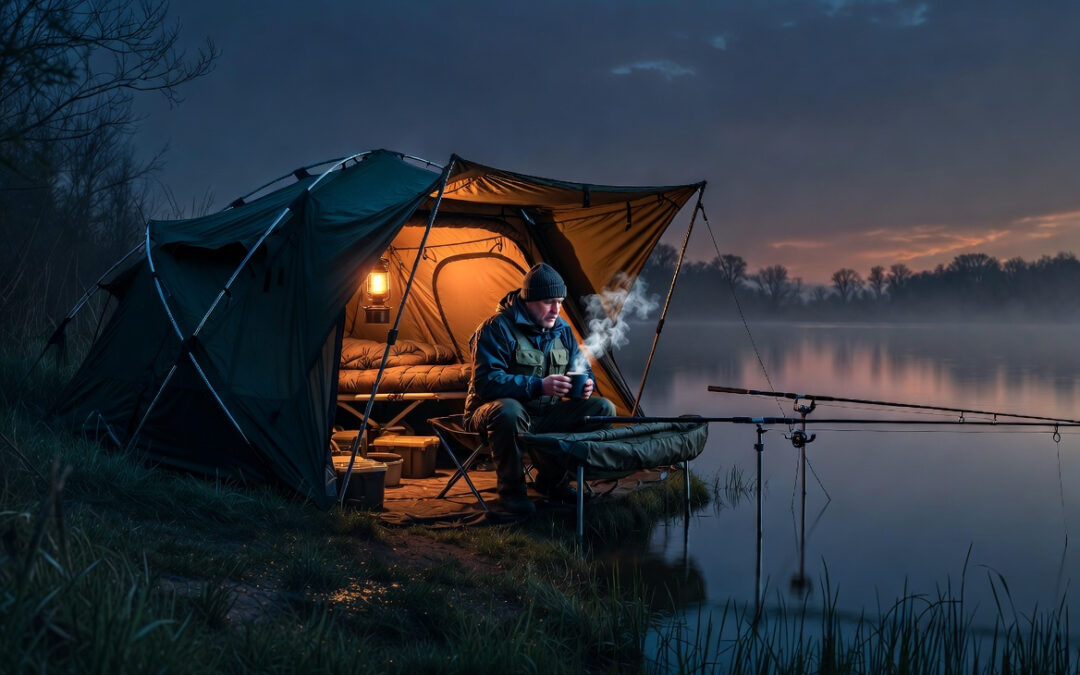
If you are planning to fish for carp for more than a few hours, you are going to need shelter. The British weather is notoriously unpredictable, and even a session that starts in glorious sunshine can quickly turn into a soaking experience without adequate cover. A bivvy is the carp angler’s home away from home, and setting one up properly can be the difference between an enjoyable session and a miserable one.
In this guide, I am going to cover everything you need to know about choosing, setting up, and making the most of your bivvy. Whether you are a complete beginner looking at your first overnight session or someone who has been day fishing and wants to graduate to longer sessions, this article will help you get your bankside accommodation sorted.
What Is a Bivvy?
A bivvy is essentially a small, portable shelter designed specifically for fishing. Unlike a standard camping tent, a bivvy is built to be quick to erect, easy to fish from, and tough enough to handle the worst of the British weather. Most bivvies have an open front that can be zipped closed when needed, allowing you to keep your rods in view while staying dry and sheltered.
Carp fishing bivvies range from simple one-man shelters that take minutes to put up, to full-sized two-man bivvies with groundsheets, inner capsules, and enough room to stand up in. The size and type you choose depends on how long your sessions are, how much gear you carry, and your budget.
Types of Bivvy
Brolly Systems
A brolly system, often called a brolly shelter, is the simplest and most lightweight option for carp anglers. It is essentially an oversized umbrella with side panels that create a small enclosed space. Brolly systems are quick to set up, often in under a minute, and are ideal for day sessions or short overnight trips where you want to travel light.
The main advantage of a brolly system is its speed and simplicity. When you arrive at the lake, you can have your shelter up and your rods out in minutes, which gives you more fishing time. They are also lightweight and pack down small, making them easy to carry from the car to your swim.
The downside is limited space. A brolly system does not offer as much headroom or floor space as a full bivvy, which can become uncomfortable during longer sessions or when you need to store a lot of gear inside. They also tend to be less waterproof than a purpose-built bivvy, although modern brolly systems have come a long way in this regard.
One-Man Bivvies
A one-man bivvy is the most popular choice for carp anglers who fish regular overnight sessions. These are purpose-built shelters with a rigid frame, waterproof material, and enough internal space for a bedchair, your tackle, and a bit of room to move around. Most one-man bivvies can be erected in five to ten minutes once you have practised the process.
One-man bivvies offer a good balance between comfort and portability. They are significantly more weatherproof than brolly systems, with taped seams, a hydrostatic head rating that can handle heavy rain, and a solid structure that resists wind. For anglers who fish overnight sessions regularly, a one-man bivvy is the standard choice.
Two-Man Bivvies
If you fish with a mate, want extra space, or plan extended sessions of forty-eight hours or more, a two-man bivvy might be worth considering. These larger shelters offer enough room for two bedchairs, a cooking area, and plenty of storage for gear. The extra space is a real luxury during bad weather when you might be confined to your bivvy for hours at a time.
The trade-off is weight and bulk. Two-man bivvies are significantly heavier than one-man shelters and take longer to erect. If your swim involves a long walk from the car park, a two-man bivvy can feel like a real burden. However, if you have a barrow to wheel your gear and your chosen venue has reasonable access, the extra comfort is well worth the effort.
Choosing the Right Bivvy
Waterproofing
The most important feature of any bivvy is its ability to keep you dry. Look for a bivvy with a hydrostatic head rating of at least 5,000mm, which means it can withstand significant rainfall without leaking. Many quality bivvies have ratings of 8,000mm or above, which will keep you dry in even the heaviest downpours.
Taped seams are essential. This means the stitching holes in the seams are sealed with waterproof tape on the inside, preventing water from seeping through the needle holes. A bivvy without taped seams will leak at the seams in heavy rain, regardless of how waterproof the fabric itself is.
Frame Material
Most modern bivvies use either aluminium or fibreglass frames. Aluminium frames are lighter, stronger, and more durable than fibreglass, but they are also more expensive. Fibreglass frames are heavier and can snap in very cold conditions if they are bent too sharply, but they are adequate for most situations and are the standard on budget bivvies.
If you plan to fish in winter when temperatures drop below freezing, I would recommend investing in a bivvy with an aluminium frame. Fibreglass becomes brittle in extreme cold and can snap without warning, which is not what you want at three in the morning during a January session.
Ventilation
Condensation is the enemy of a comfortable bivvy session. When warm, moist air from your breathing meets the cold inner surface of the bivvy, it condenses into water droplets that drip onto you and your gear. Good ventilation is the primary defence against condensation.
Look for a bivvy with mesh vents at the rear or sides that allow air to circulate without letting rain in. Some bivvies have adjustable vents that you can open or close depending on conditions. Leaving the front door partially open when conditions allow is also an effective way to reduce condensation, although this obviously depends on the weather.
Setting Up Your Bivvy
Choosing the Right Spot
Before you start unpacking your bivvy, take a moment to assess your swim and choose the best spot to set up. You want a position that gives you a clear view of your rods and alarms while being on ground that is as level as possible. Sleeping on a slope is deeply uncomfortable and you will spend the night sliding off your bedchair.
Check the ground for stones, roots, and other objects that could damage your groundsheet or make your bedchair uneven. Clear away any debris before laying out your bivvy. If the ground is soft or muddy, consider using a groundsheet protector or a piece of old carpet to protect the base of your bivvy from punctures and excessive wear.
Think about the wind direction. Ideally, you want the back of your bivvy facing into the wind, so that the front remains sheltered and your rods are protected. Setting up with the open front facing into a strong wind is a recipe for a cold, uncomfortable session and a bivvy that feels like it might take off at any moment.
Erecting the Bivvy
Every bivvy has a slightly different setup process, so always refer to the manufacturer’s instructions the first time. However, the general process is similar for most designs. Lay the bivvy skin flat on the ground in the position you want it. Insert the frame poles into their channels or clips, then raise the frame by pushing the poles into their locking positions. Peg out the corners and guys, paying particular attention to the rear pegs and the front storm poles if fitted.
Always practice erecting your bivvy at home before your first session. There is nothing worse than standing in the rain at the lake, struggling with unfamiliar poles and clips while your swim goes unfished. A dry run in the garden will save you a lot of stress and wasted fishing time.
Pegging Down
Proper pegging is essential for the stability and weatherproofing of your bivvy. Start with the rear pegs, pulling the fabric taut before securing it. Then peg the front corners and sides. If your bivvy has guy ropes, use them, especially if wind is forecast. Guy ropes distribute the load across the frame and prevent the bivvy from flexing excessively in strong gusts.
The pegs supplied with most bivvies are adequate for normal ground, but if you are fishing on very hard or very soft ground, you may need different pegs. Heavy-duty steel pegs are best for hard ground, while longer pegs with a wider profile work better in soft, sandy, or muddy ground where standard pegs tend to pull out.
Making Your Bivvy Comfortable
Bedchair
A good bedchair is essential for a comfortable night on the bank. You will be sleeping on it for potentially ten or twelve hours, so it is worth investing in one that is comfortable and supportive. Flat beds with adjustable legs are the most popular style because they provide a level sleeping surface regardless of the ground beneath them, and they double as a seat during the day.
Pair your bedchair with a good quality sleeping bag rated for the temperatures you expect to encounter. In summer, a lightweight sleeping bag is fine, but for autumn and winter sessions, you need a sleeping bag rated to at least minus five degrees. There is nothing that ruins a session faster than being too cold to sleep.
Lighting
A good bivvy light is important for safety and convenience. LED bivvy lights have largely replaced the old gas lanterns, and they are far safer, lighter, and more practical. Look for a light that is bright enough to see what you are doing when tying rigs or preparing bait, but that can be dimmed for when you are trying to sleep.
Many anglers also carry a head torch for tasks that require both hands, such as unhooking fish in the dark or navigating your way to the swim from the car park. A red-light mode is useful because it preserves your night vision and is less likely to spook fish in the margins than a bright white light.
Cooking
If you are fishing overnight or for multiple days, you will need to eat. A small gas stove is the standard cooking setup for carp anglers. These are compact, lightweight, and can boil a kettle or heat a tin of food in minutes. Always place your stove on a stable, flat surface outside the bivvy to avoid the risk of fire or carbon monoxide poisoning.
Never use a gas stove inside a closed bivvy. Carbon monoxide is an odourless, colourless gas that can be fatal, and there have been tragic incidents in the angling world caused by cooking or heating inside a sealed bivvy. Always ensure adequate ventilation when using any gas appliance near your shelter.
Packing Down
When your session is over, packing down your bivvy properly will extend its lifespan and make your next setup easier. Shake off any debris from the fabric, and if the bivvy is wet, try to let it dry before packing it away if possible. If you have to pack a wet bivvy, make sure you dry it out fully at home before storing it, as mildew and mould will quickly develop on damp fabric and can ruin a bivvy in a single off-season.
Remove the pegs carefully and store them in their bag. Collapse the frame by reversing the setup process and slide the poles out of their channels. Fold the fabric neatly and roll it up with the poles inside if that is how the bag is designed. A little care during packing will ensure your bivvy is ready to go for your next session without any nasty surprises.
Final Thoughts
Your bivvy is your home on the bank, and getting it right makes everything else more enjoyable. You do not need to spend a fortune on your first shelter, but you do need to make sure it is waterproof, sturdy enough for the conditions you will face, and comfortable enough for the length of sessions you plan to fish. Take the time to set it up properly, invest in a decent bedchair and sleeping bag, and you will find that overnight carp fishing sessions become something you genuinely look forward to rather than something to endure.
Last Updated on March 11, 2026 by Shane
I have made a lot of mistakes during my fishing sessions and don't want you to make the same mistakes. I've learned the hard way over 20 years of fishing most weekends, testing, tweaking, and testing again and now want to help you excel with your carp fishing.
If you need any help, you can reach me at Fishing Again's Facebook page