The hair rig is the single most important development in the history of carp fishing. Before its invention in the early 1980s, carp anglers hooked their bait directly onto the hook, and carp quickly learned to eject any bait that felt unnatural. The hair rig changed everything by separating the bait from the hook, allowing the carp to take the bait confidently while the hook sits in the perfect position to catch in the fish’s lip as it tries to eject the rig.
If you are new to carp fishing, understanding the hair rig is absolutely essential. It is the foundation upon which virtually all modern carp rigs are built, and learning to tie one properly is one of the first practical skills you should develop. In this guide, I will explain exactly what a hair rig is, why it is so effective, and give you step-by-step instructions for tying your own.
What Is a Hair Rig?
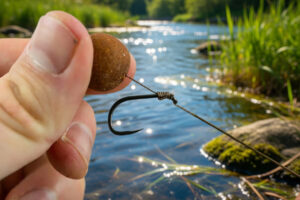
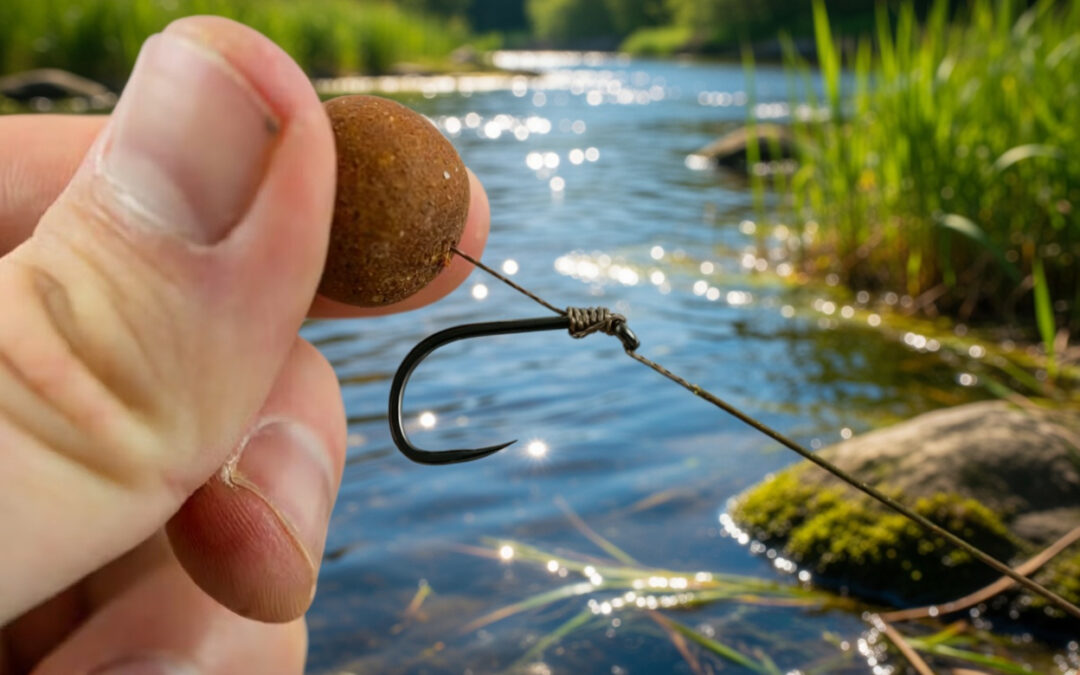
A hair rig consists of a hook tied to a length of hooklink material with a short extension of line, called the hair, extending from the shank of the hook. The bait is mounted on this hair rather than on the hook itself. This means the hook is completely free and unencumbered, while the bait hangs just below it.
The name comes from the fact that the original hair rigs, developed by Len Middleton and Kevin Maddocks at Redmire Pool, used an actual human hair to hold the bait. The hair was so fine that the carp could not detect it, and the separation between bait and hook meant the fish would take the bait without feeling the hook. Modern hair rigs use a short extension of the hooklink material rather than actual hair, but the principle remains exactly the same.
Why the Hair Rig Works
To understand why the hair rig is so effective, you need to understand how carp feed. Carp do not bite their food like a dog or a human. They feed by creating a powerful suction with their mouths, drawing food items in along with a stream of water. They then sort the food from debris by expelling unwanted items through their gill rakers while retaining the food.
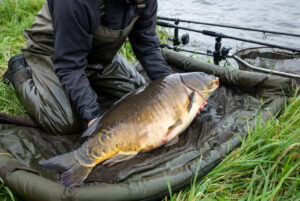
When a carp sucks in a hair-rigged bait, the hook is drawn into the mouth along with the bait because they are connected by the hair. As the fish tries to process and potentially eject the bait, the weight and shape of the hook cause it to drop down and catch in the bottom lip. The harder the fish tries to eject the rig, the more firmly the hook embeds itself. This is why carp are almost always hooked cleanly in the bottom lip when caught on a hair rig.
Before the hair rig, anglers had to bury the hook inside the bait. Carp could feel the hard metal of the hook when they sucked in the bait and would eject it before the angler could strike. The hair rig solved this problem elegantly by allowing the carp to take the bait without feeling the hook at all. By the time the fish realises something is wrong, the hook is already in position.
Components of a Hair Rig
The Hook
The choice of hook for a hair rig depends on the fishing situation, but for general-purpose carp fishing, a wide-gape pattern in size 6 or 8 is a reliable starting point. The wide gape allows the hook to turn and catch in the lip more effectively, and sizes 6 and 8 are versatile enough to handle carp of all sizes without being so large that they appear unnatural.
Hook sharpness is critical. A sharp hook will prick the lip and catch hold on the slightest contact, while a dull hook may slide off and fail to find a purchase. Many modern carp hooks come razor-sharp out of the packet, but it is always worth checking the point before tying your rig. If the point feels blunt or has turned over, either sharpen it with a hook sharpener or replace it with a fresh hook.
The Hooklink
The hooklink is the length of material between the hook and the swivel or connection to your main line. Hooklinks for hair rigs are tied from a variety of materials including monofilament, fluorocarbon, braided hooklink material, and coated braid.
For beginners, a simple braided hooklink material is an excellent choice. Braid is supple, which allows the rig to move naturally in the water, and it is easy to tie knots with. A hooklink of about eight to ten inches is a good all-round starting length that works in most situations.
As you gain experience, you can experiment with different hooklink materials and lengths to fine-tune your presentation for specific situations. Coated braid, where a stiff coating covers the braid and can be stripped back in sections, is popular because it offers the stiffness needed to prevent tangles during casting while providing suppleness near the hook for natural movement.
The Hair
The hair is simply the extension of hooklink material that hangs below the hook bend and holds the bait. It is formed during the tying process and does not require any additional material. The length of the hair determines how far the bait sits from the hook, and getting this right affects how efficiently the hook catches in the lip.
For a standard bottom bait presentation, the hair should be long enough that there is roughly one bait’s width of gap between the bottom of the hook bend and the top of the bait. So if you are using a fifteen-millimetre boilie, the gap between hook and bait should be roughly fifteen millimetres. This allows the hook to turn freely and find a hooking position without the bait interfering.
How to Tie a Basic Hair Rig
What You Will Need
To tie a basic hair rig, you will need a hook, a length of hooklink material of about twelve inches, a baiting needle, a boilie stop or hair stop, and your chosen hookbait for measuring the hair length. You may also find a rig-tying station or a pair of pliers useful, although they are not essential.
Step One – Create the Hair Loop
Take your hooklink material and tie a small loop at one end using a simple overhand loop knot or a figure-of-eight loop knot. This loop should be just large enough to pass a boilie stop through, roughly five millimetres in diameter. The loop is what holds your bait on the hair, so make sure it is tied securely.
Step Two – Set the Hair Length
Thread your chosen hookbait onto the hooklink using a baiting needle. Push the needle through the boilie, hook the loop onto the needle, and pull the loop through the boilie. Insert a hair stop through the loop to hold the boilie in place. Now hold the boilie against the hook to check the hair length. As I mentioned earlier, you want roughly one bait’s width of gap between the hook bend and the bait. Adjust if necessary, then remove the bait for now.
Step Three – Thread the Hook
Thread the free end of the hooklink through the back of the hook eye, from the point side to the shank side. Pull the hooklink through until the hair is at the correct length.
Step Four – Whip the Shank
This is where you create the knotless knot that secures the hook. Holding the hair in position against the shank, start wrapping the hooklink around the shank and the hair, working from the eye down towards the bend. Make between six and eight tight, even turns. Each wrap should sit neatly next to the previous one without overlapping or crossing.
Step Five – Finish the Knot
After completing the wraps, thread the hooklink back through the hook eye, this time from the shank side to the point side. Pull the hooklink tight and the wraps should grip the shank firmly. Check that the hair exits the shank at the correct position and that the wraps are neat and even.
Step Six – Test the Rig
Before you use the rig, test it. Hold the hook by the hooklink and check that it turns and sits with the point facing down. This is called the turning test, and it tells you whether the rig will catch in a carp’s lip effectively. The hook should rotate smoothly under its own weight so that the point faces downward, which is the position it needs to be in to prick the lip during ejection.
Also, give the knot a firm pull to check it is secure. Better to find out now than when a carp is on the other end.
Variations and Tweaks
Using a Line Aligner
A line aligner is a small piece of shrink tube or silicone tubing that is threaded onto the hooklink and pushed over the eye of the hook. It extends the shank effectively and improves the turning mechanics of the rig, making it even more likely to catch in the lip. Many experienced anglers use line aligners as standard, and they are a simple tweak that can improve your hooking rate.
Pop-Up Hair Rigs
To fish a pop-up boilie on a hair rig, simply replace your bottom bait with a buoyant pop-up boilie. The hair and the knotless knot remain the same. You may need to add a small piece of putty or a split shot to the hooklink to counterbalance the buoyancy of the pop-up, depending on how high you want the bait to sit above the lakebed.
Multi-Bait Hair Rigs
You are not limited to a single bait on the hair. Two small boilies, a boilie topped with a piece of artificial corn, or a combination of real and fake baits can all be mounted on the same hair. These multi-bait presentations can be very effective and allow you to experiment with different visual and flavour combinations.
Common Mistakes to Avoid
The most common mistake when tying hair rigs is getting the hair length wrong. A hair that is too long allows the hook to sit too far from the bait, reducing hooking efficiency. A hair that is too short means the bait can mask the hook point. Stick to the one-bait-width rule as a starting point and adjust from there.
Another common mistake is not whipping the shank with enough turns. Fewer than six turns can allow the hook to slip in the wraps, which compromises the rig’s mechanics and strength. Six to eight neat, tight turns is the sweet spot for security and performance.
Finally, always make sure the hooklink exits the eye on the correct side of the hook. The line should come out on the same side as the hook point, not the back of the shank. Getting this wrong will cause the hook to turn in the wrong direction and dramatically reduce your hooking rate.
Final Thoughts
The hair rig is beautifully simple in concept but devastatingly effective in practice. It is the reason carp anglers can catch fish consistently, and learning to tie one properly is a rite of passage for every angler. Take the time to practise at home until you can tie a neat, reliable hair rig quickly and consistently. Once you have mastered this fundamental skill, you have the foundation to explore the huge variety of rig variations and presentations that make carp fishing such an endlessly fascinating pursuit.
Last Updated on March 11, 2026 by Shane
I have made a lot of mistakes during my fishing sessions and don't want you to make the same mistakes. I've learned the hard way over 20 years of fishing most weekends, testing, tweaking, and testing again and now want to help you excel with your carp fishing.
If you need any help, you can reach me at Fishing Again's Facebook page