Use Stick Mixes in PVA to Increase Your Catch Rate
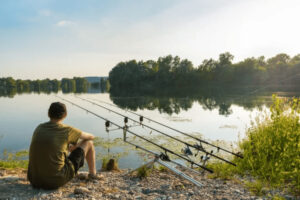
If you do a lot of short session fishing like I have done this year, I want to show you a little Stick Mix that I’ve been using.
It incorporates some of the Mainline stick mixes and bag mixes that are on the market. Mainline is renowned for hugely effective boilies, but I also use their pellets and powders to add attraction to my stick mixes to get the fish to home in on my rig.
List of Ingredients I Use
Before we start, buying these baits in the tackle shop can be expensive. I have found the best prices on Amazon and have added links below to each product to save you some money.
- Mainline Baits Carp fishing Spod and PVA Pellet Mix
-
Mainline Crushed Tiger Nut New Carp And Coarse Fishing Stick Mix
-
Mainline Active Ade Particle and Pellet Syrup
-
Sticky Manilla Yellow Ones Pop-Ups
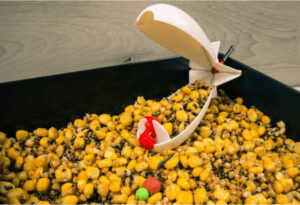
How To Make The Stick Mix
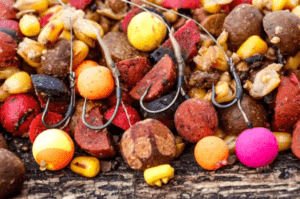
The first stick mix I want to go through includes some of the new pellet combo from mainline. They sell all different pellets in various different sizes with lots of different breakdown durations. I put a couple of handfuls into the bottom of a tub. Then I get one of my favourite stick mixes, the activ8 hemp mix, and a handful gets added to the tub.
One of the other stick mixes they do comes in the bag form is tigernut stick mix, again add a nice handful into the mix, the final part I like to do is add some old yellow popups which I usually find in the bottom of the rucksack, put them in the crusher, break them up until they are a fine dust and pour them into the mix and stir them until everything is spread and mixed nicely and evenly.
You will see the little yellow bits, which are the popups, and then the final component that goes in is actually one of the pellet and particle soups that mainline make, I use the new grange soup because that matches the boilies that I often use on short day sessions.
I always like to catapult a few boilies around the bags when I cast them out to compliment them.
So those are the things I add to my mix, mix it together, but don’t make it too wet to start with. Put a small amount of lake water it in it, just get it nicely stirring, so you get a nice little damp ball that you can join together. Make sure the mix doesn’t get too wet because when you get it right, it will slowly dry off a little bit and you’ll have a nice breakdown speed when it is on the lake bed.
That’s the sort of consistency I like, I don’t want it to be a sticky ball because once it’s in the bag, I want it to break down so the little particles of pop-up start fizzing away, along with the activated hemp mix, to draw the carp in.
It’s definitely something you should be using.
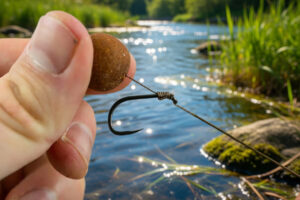
Then, quite simply, I put it into the original funnel web system, which is the PVA system I like to use. Then, rather than thread the stick down the rig, because the anti-tangle sleeves have become a bit of a signature of my rigs now, I like to just hook them on.
I do this for two reasons, firstly, because I haven’t got a quick release system that incorporates the anti-tangle sleeve, but also because I don’t like the knot or anything around the hook.
One final point you will notice with my rig is that because you’re hooking it through, it doesn’t actually sandwich the hair against the hook, so what I like to do is get some of the quick melt PVA tape and just do a little granny knot and just sandwich that hair against the hook, so when it is cast out it stops the hook bait from wrapping around the hook during the cast.
Just before you cast out, I like to add some of the mainline syrup its a good idea to add PVA friendly liquids before you cast and that’s it, ready to be cast out there.
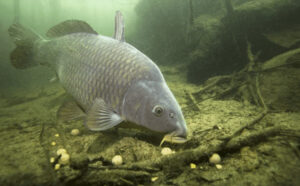
Then, when it lands on the bottom of the lake, the presentation is ready to and waiting for the carp. If you do short sessions, a little stick mix like this is definitely going to put more fish on the bank.
Use Delkim Line Clips For Better Bite Indication
Delkim Line Clip – The Smart Clip
Delkim’s very clever line clip design has completely changed my fishing when I am hunting down large weary carp. The line clip is called the smart clip and it’s an absolute godsend for me because my fishing rods don’t have a line clip, so I’ve been very impressed with this product from Delkim because I do like using line clips. I bought this pack of 3 line clips for my rods.
Let me talk to you through the actual product and how it works.
The first thing is how you put it on to the actual rod blank, they are compatible with any rod on the market.
The first thing you do is take the clip out and hold it against the rod, it actually comes with what looks like a giant rubber washer, so take the loop around and pull it through the two steel ball bearings which are spring loaded inside of the clip, then take it over the other side of the rod and put them both in. There’s a good tension, but don’t be alarmed it doesn’t mark the blank or damage those lovely rods that you have spent loads of money on.
How To Use The Delkim Line Clips
Now on to how it actually works, there are loads of different ways of using it. The most simple way of using it is by clipping the line once. If you like to have a line clip that just comes out once, you can do that, so if you get a bite, the line pulls out of the clip, giving you that indication of a bite. You can also quite simply, put the line into the two little ball bearings and when you get a bite, the line will pull out of the ball bearings indicating that you have a bite. Alternatively, this is what I really like about them, there are multiple configurations available depending on your fishing style. You can take it once through the front clip and then into the ball bearings, that gives you double tension, so as a fish takes your rig, it pulls down on that tip really aggressively and even before you’ve got to the rod, it’s almost like it’s struck for you because it’s got that test curve of the rod into the game .
Or you can go twice you can go through the clip, through the ball bearings and then through the back clip as well, double whammy, extra tension and that is going to give you better hook holds. Talking about the actual bite indication part of it, you can actually move the clip towards the alarm, if you do that, it actually reduces the weight of the bobbin so if you’re fishing slack lines but you still want to capitalize on your duo carbs in your Night Light Pro by having the line clip at the front you can actually reduce the weight of the bobbin. If you’re fishing at Range and you want to a heavier bobbin, have a line clip about a foot away from the buzzer and then that is going to give added weight, then when the fish pulls that up, you’re going to maximize the weight of it. If you have the line clip around 6 inches from the buzzer, because they are closer it’s very subtle, if you have got a slackline, the lines are drooping from the line clip to the bite alarm, but I’m still able to have my swinger nice and sensitive so the line clips are a brilliant addition to your setup.
Delkim ES Indication Set – Duo-Carbs
Now talking about the night light pros and the duo-carbs, they have been very popular so Delkim has now reduced the length of them for those tackle tarts out there with the ES Indication Set. They are shorter and now very easy to setup, just clip the duocarb on to the front, it just clicks on, quite simply. It’s important to have the head of the bobbin facing outwards so that the part that lights up facing out towards the lake and then when you push that into the jack socket it will make sure every time it comes up it doesn’t twist, everything is streamlined and the light should be facing you. Onto the night light pro, it’s worth pointing out that they don’t actually need a battery themselves as they utilize the power from the the TXI body, so it imitates everything that the buzzer does, so if you get a bleep on the bite alarm, you will see the night light pro illuminating both LEDs to mimic each other. You can also have it on a night light setting so it imitates an isotope if you like. I really like the night light, it’s clever and if you’re a bit of a tackle tart it’s a lovely feature. Onto the duo carbs again, even if it’s really windy, there will be absolutely no movement on the bobbin and that was what they were designed for, to allow you to have a nice lightweight bobbin that was stable in high winds and if you like the swinger effect you have got the best of both worlds.
Delkim Snag Ears
Now moving on to the snag ears, again a wonderful feature, beautifully engineered and that’s what I like, it is a trademark of all of these Delkim items, they are really well thought out and well put together.
Daiwa Luggage Bag Range – Highly Recommended
Daiwa Mission 40ltr Roving Rucksack
The first time I saw these Daiwa rucksacks was at the Big One Carp Show. This one, the Daiwa Mission 40ltr Roving Rucksack looked perfect for me, because I am always trying to take less tackle on short sessions and it is amazing how much fits in this little tiny rucksack.
The top section for me is perfect because I put in my bank sticks in there, my buzzers and all that sort of stuff. I’ve got my polarized glasses and bits like that in there as well so that it opens up first at the start of the session, banksticks going the ground and buzzers clip into those and then that just gets zipped up and out the way.
Then the other pockets on the outside at the front, I have marker floats in there, I’ve got a catapult, spare parts all that sort of stuff in the front. Then on the sides I’ve got another little bag that goes inside that one, so I’ve just got little tools and bits and pieces in there, car keys and stuff go in there as well so I know where they are, then on the other side I take power bank with me to recharge my phone 3 or 4 times during the session because I’m always emailing and on the phone with the boys at work.
Then to show you inside, put your fishing towel in there, rig box in there, tackle box as well, rig wallet, and another odd bits and bobs bag as well and then at the bottom, another bits bag which has my leads in that one as well. So much can fit into this bag and for me, it just packs in there perfectly so I can get everything that I need to take with me into it. Which means I don’t take too much tackle with me.
The best thing about this rucksack is how it feels on your back because everything’s compact and it sit’s high up on your back, the way it’s been designed it just fits into the curve of your back so well. I do loads of walking when I’m fishing big reservoirs, it might be three-quarters of a mile round to the swim so I put this on my back the rest of the gear goes on my carp porter and I’m around the lake. So that’s the one that I use.
Daiwa Mission 110 ltr Rucksack
This has all of the features of the roving rucksack but is much deeper. You’d have to take a lot of kit with you to use the larger one, it’s the Daiwa Mission 110 ltr rucksack. The straps on the back of the larger version are really well padded and it just fits your back really well, it’s really comfortable to wear and you would get absolutely loads of kit in there, twice as much as I need to take with me but if you take a mountain of gear, that’s the one I recommend, both extremely well made and well thought out as well.
Daiwa Air Dry Bags
These air dry bags are made by Daiwa and are part of the infinity set, they’ve got loads of structure to them because they are made with a mesh coated in plastic, which means they stand up on their own with nothing in them, so really good when you’re pouring boilies into them, they don’t end up going everywhere. They will sit upright on the floor and lots of air can get through the boilies. This model takes 9 kilos of boilies, this is a larger one of the two and then the smaller one takes 5 kilos.
If you are doing a long session, you must dry freezer boilies out, else they will start to turn mouldy which is obviously a waste. So, a few tips if you’re drying your baits out, what you would do is spread them out on your unhooking mat if you can, as soon as they come out the freezer bag, but not in the sun, spread them out so they just dry out and get rid of as much moisture as you can. Then transfer them into one of these air dry bags and keep them moving around throughout the session by shaking the bag, that’s really important because what happens is, the moisture collects between the boilies and they start to go off from the middle of the bag outwards.
If you can hang them up in a tree in the wind, that’s even better because that will help take the moisture out of them, but if it’s gonna rain putting back in your bivvy. I put mine in a bucket if the rain starts and as soon as it stops raining, I get them back out again and get as much air to them as possible, because baits like Mainline boilies will go off, that’s the reason it’s so good, because it’s breaking down all the time and letting out all of the attractants to draw in the fish. If you leave it somewhere that’s damp and a bit warm, it is going to go off really quickly, so air dry bags will save your bait.
One other use for them that I worked out earlier on this season, is to use them for anything that’s going to get wet during the session, such as waders, rather than storing them in a normal bag which will seal the moisture inside, you put me inside one of these are dry bags you can then hang them up at the back of the bivvy or on the tree branches and I will start to dry out during the session. Put them in the back in your car and they will also start to dry out, so it stops things like waders and wet jackets getting mouldy. A really good use for something that is designed to normally only keep boilies in. I also keep a couple of these bags in the van just as overflow bags, so if I have got to take extra bait or need lots of hook baits or whatever with me these actually show you what’s inside it so you can stick at the back of the bivvy and you know exactly what is there, so a good little product but it has loads of uses as well.
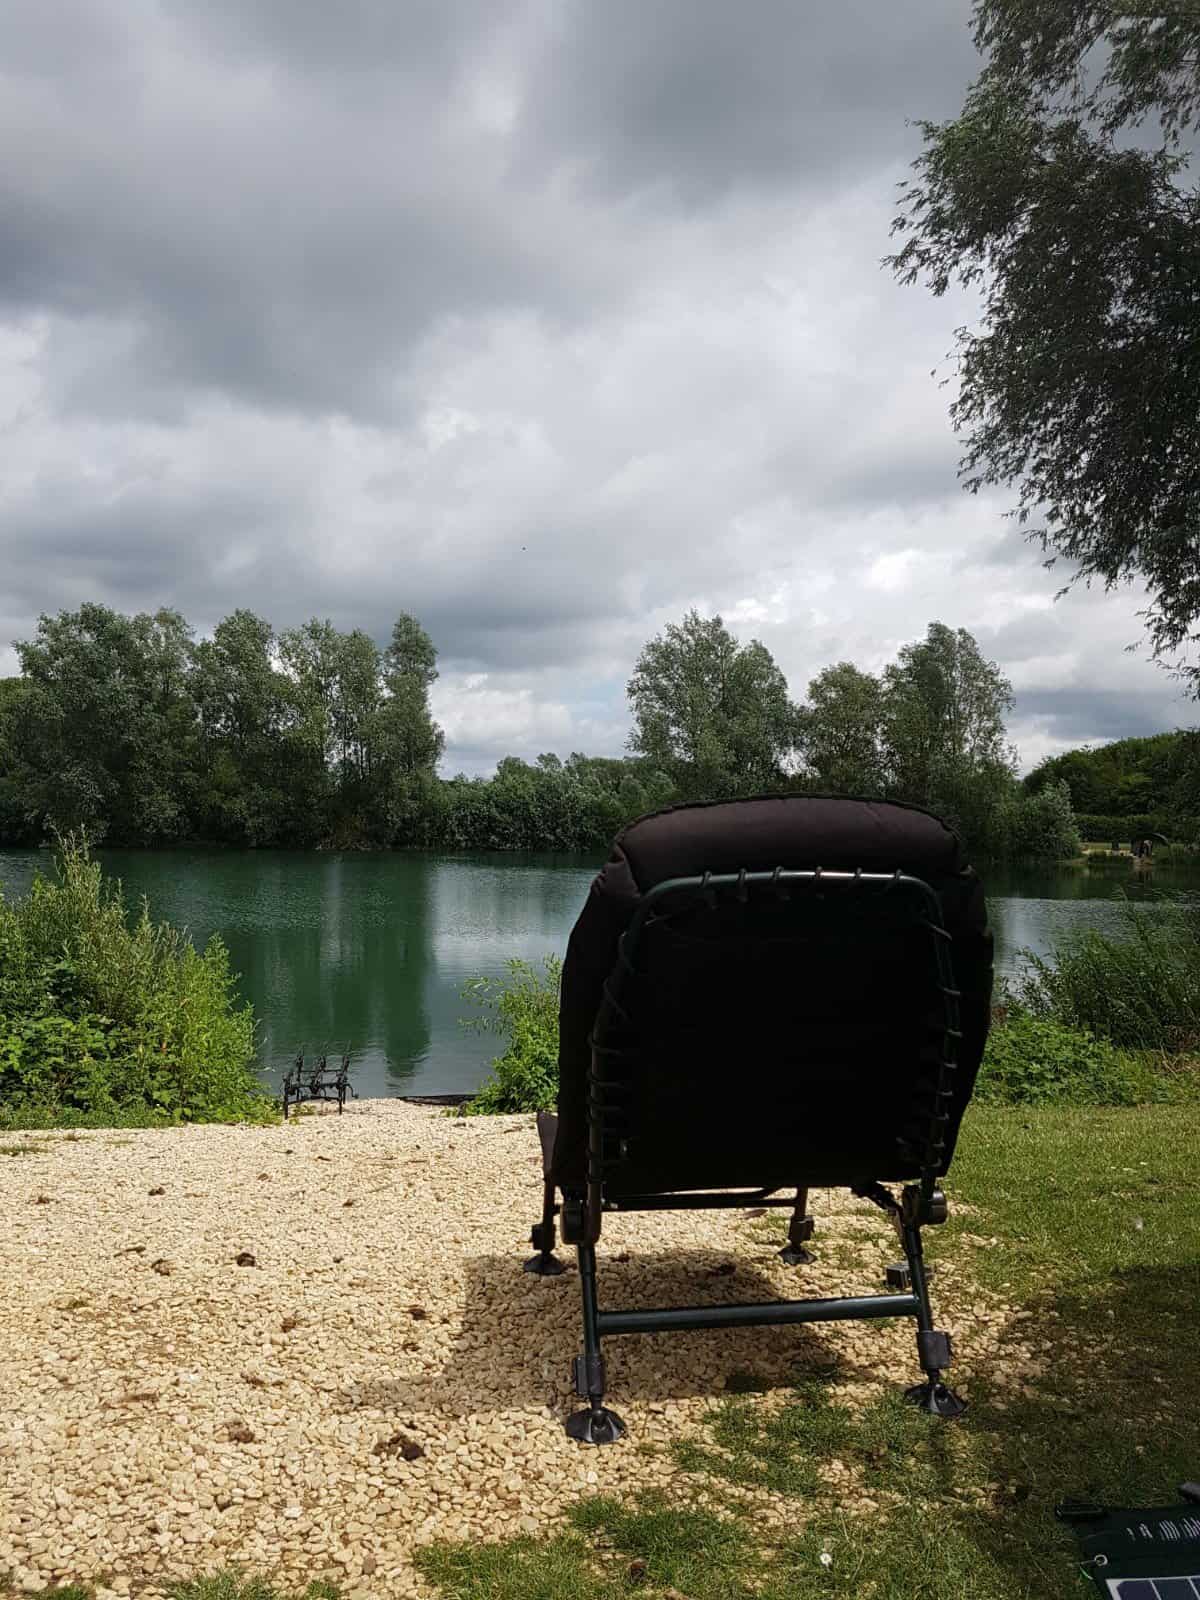
A Comfortable Bedchair Is A Must Have
Daiwa Infinity Sleepeezy Bedchair
The Daiwa Infinity sleepeezy bedchair has got quite a few new features compared to the older model.
First of all, the sides have been further padded out now, the padding is much thicker than the previous bedchairs so this alone is going to help you get a better night’s sleep.
You can also remove the central padding section which is stuck down with velcro, which is handy if you want to wash it or not fish with it, although, there is no reason why you wouldn’t want to use it because it’s super thick and really comfortable to sleep on.
The whole configuration of the bedchair now is much flatter too, a lot of bedchairs in the past used to curl up at the end, then when you put a pillow on top as well, you are too high up and not laid flat so you will get a much better night’s sleep with this updated model.
As well as it being a big bed chair measuring at over 200cm long and over 80cm wide, it has 6 cam lock telescopic legs, so it’s very stable and you have to check out the weight, it is super lightweight. This model is made of aluminium and then on the bottom of the legs, there are large feet that are on a ball joints so they will rest into any part of the ground that you put them on, again, it helps the bed get flatter and makes it more stable as well. It is very well made like all the Daiwa products.
That’s the bedchair let’s look at the chairs.
Infinity Specialist Chair
These are the updated chairs from Daiwa, first of all, the Infinity Specialist Chair.
It has got a tray on the side for your boxes of maggots, something to put your bottle of water in.
If you’re sitting on a chair for a long time, armrests make a massive difference to how comfortable it is. If you just want to chill and just wait for the bite to come there is a nice headrest as well, and like all of the Daiwa chairs it’s very tight where you sit, it doesn’t sag in the middle and that makes it more comfortable.
The next one in the Infiniti range this is Grande luxury, if you are doing day sessions as a carp angler it’s not quite a bed chair, so it’s got a footrest at the end to put your feet on and it does recline, so it’s completely flat. You may want to get up early in the morning and have a bit of kip during in the daytime, you can put it out like a bed and keep on it but it’s not long enough to actually do long sessions on like all of the bedchairs in the range. It is made from aluminium so it weighs next to nothing, it has large feet on it as well and the legs lock into position so it can’t collapse when you’re sitting on it. So if I was just doing a session this would absolutely be the one I would use. Finally, the mission low chair, all of the others are lightweight, this is just ridiculously light, like a feather, it is aluminium tube all the way through and these armrests really make a difference, not just when you’re sitting on it but pushing yourself out of it to get to the rods because it is quite a low chair, it really does help to have the arms.
Use Liquids to Draw The Carp Into Your Rigs
These liquids are new to the Mainline range, there is a Cell flavoured liquid and also the Clockwork Orange flavoured liquid. The cell flavour needs absolutely no introduction and the Clockwork Orange is great, if you looking for a sweet smelling fruit liquid to add to stick mixes or to add to the outside of a PVA bag, then that’s definitely one that is worth a try.
Now moving on to some of the groundbaits in the range, the cloud9 groundbait is one I’ve been using loads and loads over this year. This goes straight into my spod when I’m spodding over zigs to create that cloud and I also love using the tigernut one, a real favourite of mine, again, one to put into spod mixes. If you spod it over zig rigs, that will give it a big cloud around your rig, that’s the tigernut meal inside it that helps add that affect and if you wanted it to add it to a spod mix when you’re fishing on the bottom, it will aid that also and draw the fish in towards your rig.
Finally, the particle and pellet syrups, if you want to give your pellets an extra glaze or some extra attraction, then these are definitely the ones to use with your bait, but also to put into your spod mix. If you want to give that spod mix an extra taste and an extra edge than that is also brilliant for that, so if you want to get a quick bite and boost the attraction in your swim these are brilliant for the job.
Trakker Levelite Bed – The Best In The Range
Dimensions:
- L214cm x W88cm (open)
- L76cm x 88cm (closed)
- Weight: 9.6kg
- New double-hinged technology
This is the new Levelite Bed from tracker, it’s not classed as a bedchair because it can’t be fished with as a chair as there is no ratchet to adjust the angle of the back, all you get is one of the new mechanisms at either end and that allows it to unclip and fold out perfectly flat in an instant.
It’s really quick to set up, has a really wide sleeping area, the much needed thick foam on it and then the thermal covering makes it really comfortable. Then on the outside, you have got a thick foam padding area around the side but in a really robust material, so it’s not going to wear out.
The chair was designed to not curve up at the end, so that when you fish on the bank that has a slope on it, normally with bedchairs your head is up too high, which results in a poor night’s sleep, as you may already know. With this one, you can get it perfectly flat. I’ve done a few nights on it now and they are the most comfortable night’s sleep I’ve ever had on a fishing bed.
A new mechanism on the legs as well, trakker have designed this with one little button that you press and the leg just drops to the ground and it just finds its level straight away, it’s a really good addition to it and really speeds up the process. The other thing about that mechanism is when you fold it up, it’s designed to be folded up with a sleeping bag inside it. I never put a sleeping bag back inside the bag you buy it in as they rarely fit back in without a struggle. I always keep it on the bedchair and I’ve actually broken few frames where I’ve been trying to fold the bedchair up with too thick a sleeping bag inside it. I use a 365 sleeping bag with the inner section in it in the winter and that will go on top of the bed and fold up perfectly inside it without compressing it too much.
It goes into a nice compact shape and that’s really important as well. If you are putting his back into your car, a lot of the other big bed chairs that are currently on the market have got bits sticking out at all angles and they are difficult to go back into your car. This one is really compact, there are no bits jetting out and it just slots in perfectly. The other major advantage about this bed is it’s much lighter, not having the ratchet on the bed reduces the weight considerably.
There is as much aluminium on it as possible and it is probably 30% lighter than a lot of the other bed chairs in its class, so extremely well made the best night sleep I’ve ever had on the bank, this is the bed I’m using next season.
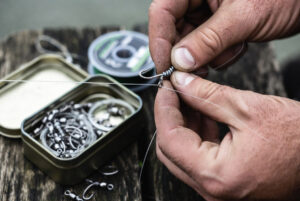
The Best Bait Needles and Rig Tools
Something that is often overlooked and underestimated, is the importance of good rig tools in your tackle box. I have gone through probably hundreds of baiting needles over the years, often from doing things with them that I shouldn’t be doing, such as not pre-drilling rock hard baits. So I wanted a set that was long-lasting, but these are also colour-coded so you can easily recognise which one was which. So let’s go through the range.
The Stringer Bait Needle
This one is called the stringer needle, it’s red coloured, it’s got a nice latch on the end so if you’re feeding on long sticks or stringers then that’s the one you want to use. It’s really hardy, it’s not going to bend or snap, so you can push it through nice firm boilies or PVA sticks and that will slide then nicely onto the rig.
The Leadcore Bait Needle
The next one is the orange one, now one of the things I used to hate when I splice lead-core was the little flimsy needle they often came complete with the lead core. This one totally solves that, still fine, the very durable and you won’t have that problem with that little nib breaking off every time you use it, So for splicing lead-core use the orange one.
The Fine Bait Needle
Now this one’s called the fine needle, it is the purple head, now this one is good for when you’re using really small baits and you don’t want them to crack, this one cuts through the bait really well and also if you want to reuse sinkings or some of the new and no trace system beads, then again this fine latch needle is perfect for that job.
The Heavy Latch Bait Needle
The next one is the green one, this is the heavy latch needle which is quite simply just an all-round boilie needle with a latch on the end so whether you are using boilies or some other baits then this is the one to use.
The Braid Bait Needle
Next up, I would say is my favourite, this is what we called the old warhorse, this is the braid needle it’s got a very sharp tip on the end, with a sort of submerged barb. I use this for almost every form of bait it cuts through really tough baits like nuts, sometimes you can even use the tip of it to push nicely through those firm boilies without cracking them. You can work it through almost like a drill and it’ll cut and won’t actually split them because it’s still got a nice thin diameter to it. It’s also brilliant when you just want to hook some floss as you would have seen plenty of times and the rig that I use incorporating and micro rig swivel. You can just pull the floss in and just thread the bait nicely on their rig, you don’t need a latch, sometimes I find the heavier latch needles can bore a large hole through the bait, this is brilliant when you want to thread on a pop up, so you don’t want to put too big a hole in them or it will affect the buoyancy, so an excellent little needle, one to definitely use.
The Rig Puller
The last one in this little selection of rig tools is the puller tool. It does exactly what it says on the tin, it’s been a godsend since it’s release. Put swivels over it, or a hook and you can pull it down nice and tight. I like to have two of them, then you’ve got either end of a rig, for example, then you can just tease those knots down, absolutely brilliant and I haven’t stopped using it since I bought them, I couldn’t recommend it enough.
So, there you have it, some of the best baits, attractants, equipment and tools on the market today to give you the edge on the bank.
Last Updated on June 11, 2026 by Shane
I have made a lot of mistakes during my fishing sessions and don't want you to make the same mistakes. I've learned the hard way over 20 years of fishing most weekends, testing, tweaking, and testing again and now want to help you excel with your carp fishing.
If you need any help, you can reach me at Fishing Again's Facebook page