How to Setup Bite Alarms
A step-by-step guide on how to setup bite alarms
Setting Up the Bite Alarm
- Make sure the alarm is switched off to stop accidental bleeps.
- Attach the bobbin to the bite alarm.
- Attach the bite alarm to the bank sticks or rod pod.
- Ensure the bite alarm is in line with the line when the rod is placed on the bite alarm. The alarm should be facing the swim. The alarm shouldn’t be able to move freely.
- Once the rod has been cast, allow the line to sink into the water. This could to up to 5 minutes depending on the type of line you use.
- Adjust the drag on your reel to your liking.
- Make sure the line is touching the roller of the bite alarm.
- Attach the bobbin to the line and adjust accordingly.
- Tighten the reel spool to lift the bobbin into the correct position.
- Switch on the alarm and adjust the sensitivity, tone, and volume settings to your liking.
- Test the alarm by pulling lightly on the line to lift the bobbin and activate the alarm.

What Is a Bite Alarm?
Bite alarms are electronic devices that can be used to notify an angler when a fish moves a fishing line. These devices are attached to a fishing rod and have a running roller that makes a noise whenever the line moves. They can also provide an audible alert whenever there is a movement of the line.
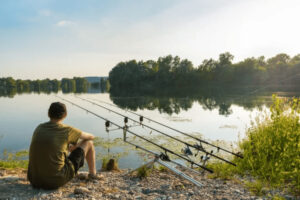
For many years, I didn’t have a bite alarm when I was fishing for carp. I just watched the tip of my rod and tuned in to the drag to play out line. Now that I have one, I can’t believe how I survived without it. It’s useful in identifying the movement of the fish near the end of your line, and it’s exciting to hear a screaming bite as it happens on a fishing trip.
These devices can be made of various types, such as simple devices that have an on/off switch. They can also be used for different types of fishing, such as coarse fishing. Bite alarms are usually useful when you have multiple rods.
For carp anglers, budget bite alarms are better than having no bite alarms. But of course, the more pricy bite alarms have more features to help you to detect a bite.
If you are deciding on which alarm to buy, don’t forget to read the bite alarm reviews.
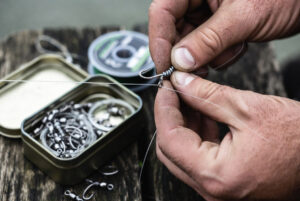
Bite Alarm Set
When buying bite alarms, they are best bought as a set. With a set, you will receive, 2, 3, or 4 bite alarms, and receiver, and a box to protect the alarms. Some sets will also include a bivvy light that will turn on when your alarm is triggered.
Although bite alarms are commonly used as visual bite detectors, they are also known to be more effective when creating an audible tone as they do not require constant monitoring.
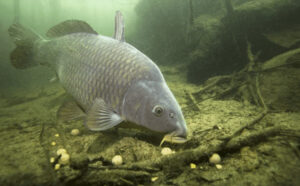
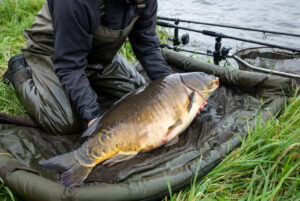
Bite indication, on occasion, can be a very important aspect of carp fishing, especially when you are hunting for large carp. The wise carp are very well practiced when it comes to staying calm whilst hooked and just spitting the hook out.
In my opinion, the best bite alarms on the market are made by Delkim.
How to Use Bite Indicator Bobbins
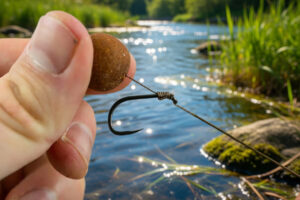
Bite alarms for carp fishing are a vital part of the equipment checklist, as it determines whether or not a fish has touched the bait. In the case of carp fishing, an indication of this can be found in the form of a bite alarm, which is attached to a variety of devices such as a swinger or a bobbin. Bite indication
Most people prefer to use the same type of indicator as they have always used. For me, the ND swingers are my preferred choice due to their versatility. I can alter the weight of the bait depending on the weather conditions. This allows me to choose a system that is light or heavy.
Using a pod or bank stick can be done without having to constantly monitor the rod. This eliminates the need for the angler to touch the rod again after setting it up. If the bite alarms are set correctly, most of the “bleeps” that occur will be caused by the fish on the line or the bait. The bite alarms are attached to either a bank stick or pod and a buzz bar. The threaded part of the alarm is then secured through an alloy or plastic support.
One of the most important tips that an angler should consider when it comes to using an indicator is to keep the rod tips low to prevent the weather from acting on the line and giving false indications. The alarm and line should also be in a straight line to minimize the resistance of the fish to the fishing weight.
The rig is usually placed in a chosen spot, and the line is sunk using the tip of the rod until it hits the bottom. The rod is then supported by bank sticks or pods, and the line passes over the magnet or wheel. After tightening up the lead or back lead, the line is placed in the clip of the swinger or bobbin.
The swinger’s position should be such that a drop back or more positive run can be registered. If the head is parallel to the ground or between the rod and the blank, this will show pick-ups. On the other hand, if the head is in between the blank and the ground, this will enable you to see pick-ups and dropbacks.
In slackline fishing, the line may even lie on the ground. This eliminates the possibility of the line showing in mid-water, which provides an advantage when dealing with large fish. The mechanics of the rig can then provide a positive bite indication.
Most of the time you will only hear one bleep on the alarm or see the odd movement of the bobbin, but understanding what these little bleeps and movements mean may be the difference between catching big fish, or never catching big fish.
If you are not sure how to set up bite alarms, perhaps you are also not sure what equipment you will need to set them up properly.
How Do Bite Alarms Work
So, let’s start with the basics, skip this section if you have all of the equipment already. To start, you are going to need the following items;
- Rod pod or bank sticks to screw the bite alarms into.
- Batteries for the bite alarms.
- Bobbins or Hangers.
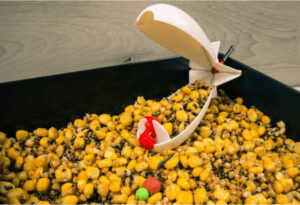
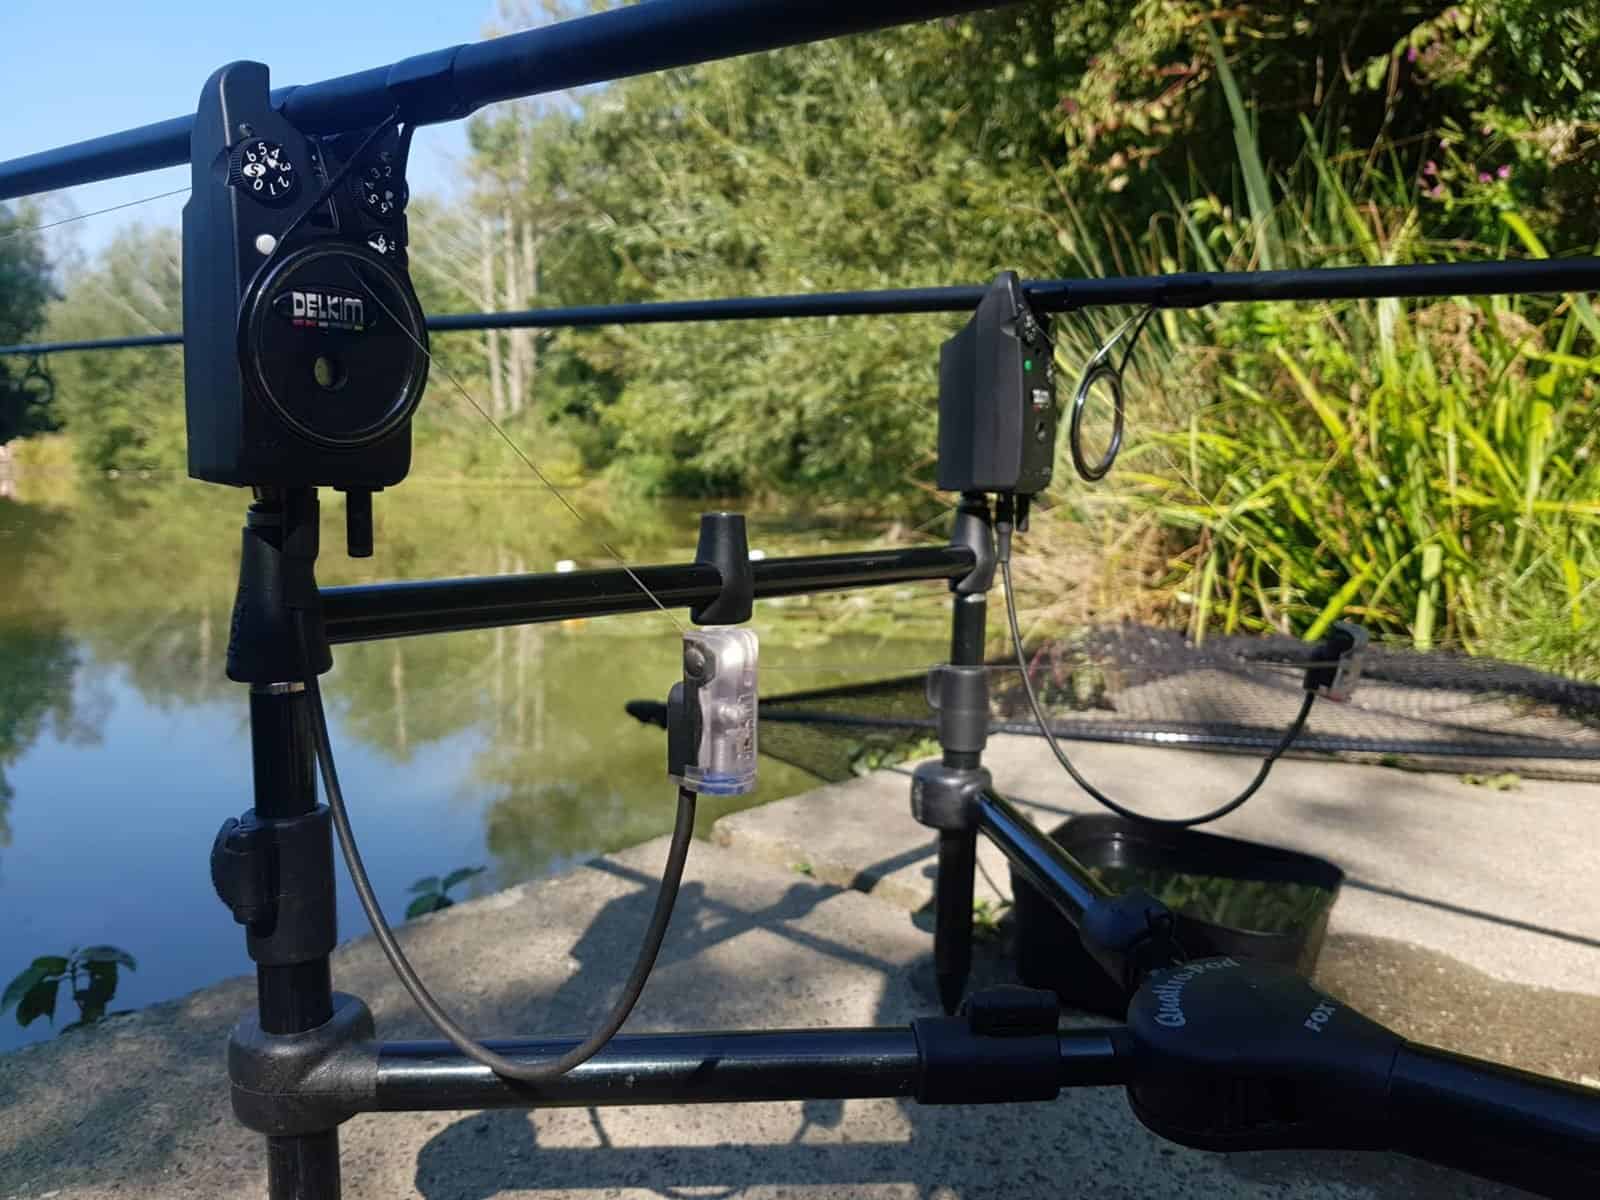
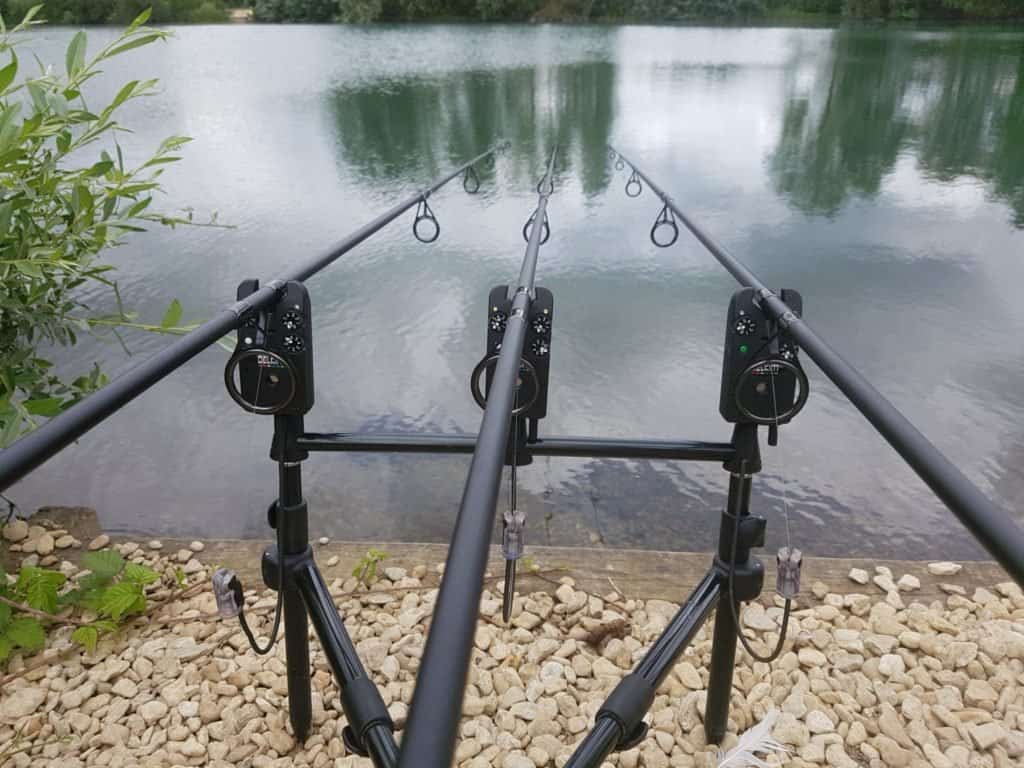
- Make sure all of the above are compatible with each other, like in the photo below.
When Setting Up The Bite Alarm
Your bobbin or hanger will feed into the bite alarm thread. Then the bite alarm will screw into the rod pod or bank sticks.
The bite alarm should be facing away from the lake. If you are using bank sticks, you should be able to twist the bank stick so the bite alarm is facing away from the lake. But if you are using a buzz bar or a rod pod, you will need an extra nut on the bite alarm so you can tighten the bite alarm into position without having to over-tighten it.
Ideally, your bite alarms will have a rubber washer on the thread, so that it compresses the rubber instead of stripping your thread if you happen to over-tighten the bite alarm.
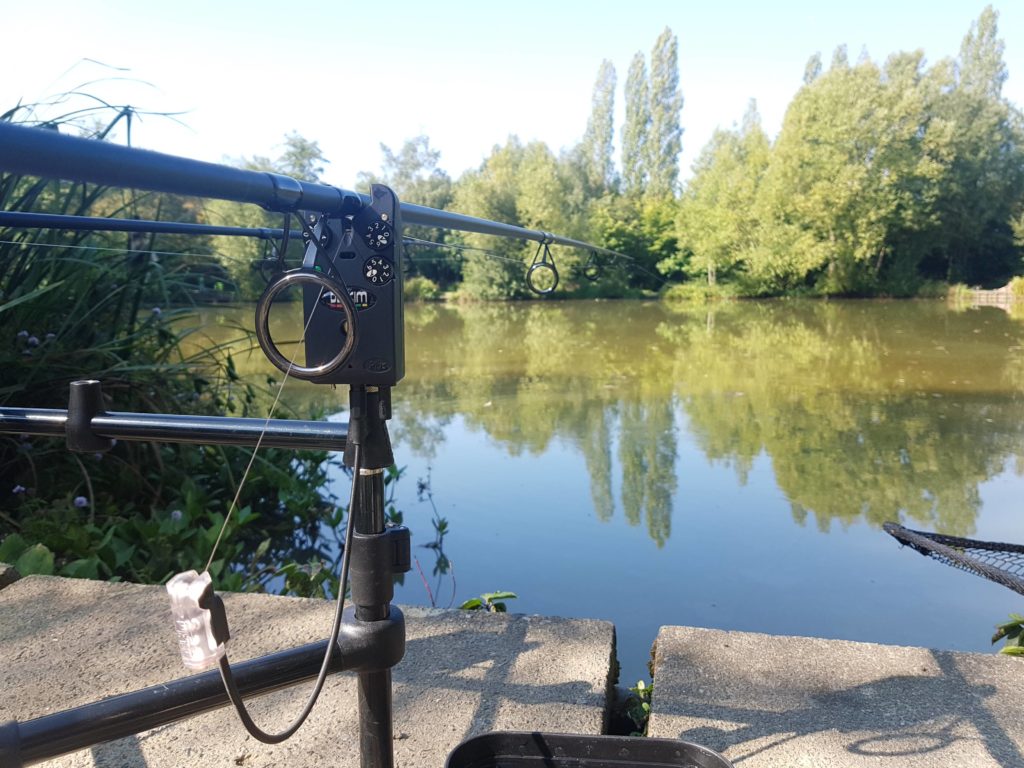
Once your alarm is set up, it will be a simple case of resting the rod on the bite alarm and making sure your fishing line is running through the bite alarm.
With most alarms, you will have adjustments that you can make, normally a volume switch or button and a tone switch or button.
Volume Control Setting
Most anglers manage to annoy all other anglers because they do not know how to use something as simple as the volume switch.
As much as it might be nice for you to let the rest of the lake know you have managed to catch a fish, let them know by other means as opposed to your bite alarm volume being set as high as possible.
The volume should be loud enough for you to hear from your bivvy, but low enough so no one else can hear it.
If other anglers can hear your bite alarms because you have to turn the volume up so you can hear them, then you owe it to the other anglers to buy a receiver and have that close by on a low volume, and then have the bite alarms volume set to low, or off.
Other anglers don’t want to hear your bite alarms.
The other mistake the majority of anglers make is not turning their alarms down when they set the bobbin.
This can be very frustrating for other anglers, especially if they have the same bite alarms as you because they will think it is their alarm that is sounding. Make sure you turn the alarm volume down, or off if you have to adjust your line.
Tone Control Setting
The tone setting is most often used to distinguish your alarms from each other, and to distinguish your alarms from other anglers’ alarms who may be using the same type.
I prefer my tone setting to be on low. Having the alarm setting on low will lower the chance of the sound traveling across the lake to annoy other anglers. The low setting is a lot more elegant than the high pitch squeal of the higher-tone setting.
Typically, when fishing with more than one rod and alarms, I will set my left alarm to the lowest tone setting, the middle alarm will be a slightly higher pitch, then the third alarm will be the highest pitch of the three, that way, as soon as I hear the alarm, I know exactly which alarm has been triggered.
Sensitivity Adjustment Settings
The sensitivity setting is a feature of quite a few new alarms on the market. The sensitivity setting will allow you to adjust the setting according to how reactive you want your alarms to be.
If you are fishing for big fish that may only pull on your line ever so slightly, then you will want to turn the sensitivity up higher than normal.
If you are fishing on a run’s water, hearing the bite alarms whizzing off at a rate of knots, may mislead you as to what is happening with your line.
It’s all about balance and testing sensitivity at the start of the session. But be sure to test the alarms with the volume down low. If you are getting false alarms or fishing in windy conditions, you may need to turn the sensitivity setting down.
What is a Bite Indicator Bobbin?
The purpose of the bobbin is to apply tension and pressure to the line when it passes over a bite alarm. This will help increase the effectiveness of the device and provide additional warning in case of a dropback.
Bobbins are used to help you visually see if your rig is being played with. When the fish moves your lead, it would be difficult to see the line move without the help of a bobbin.
Although, keep in mind that it isn’t always necessary to use the bobbins all of the time.
Even when you do use bobbins, you should be watching the tip of the rod to judge whether you have a fish on your line, or better still, to watch where the line enters the water and watch for unusual movement.
Swingers vs Hangers
The swinger can be used for almost all situations due to having a wire between the bobbin and the bite alarm instead of a chain, and there are many different choices of length, size, weight, and colors to suit your needs. There are also clip-on weights to help when the wind gets up. Although the swingers are not as accurate as stow bobbins, the line will pass through the hanger before reacting to the bite.
This is also the case for traditional hangers, although wind can have an effect on the bobbin which will mean you’d need to turn the sensitivity down on your bite alarm, you wouldn’t need to do this with the swinger.
Various swingers types are available the longer-armed swingers are used for slacklining as the swinger will rest on the floor and then lift when you get a bite. The short-armed swingers are generally heavier and should be used with tighter lines when fishing at long distances.
You will see hangers more often on the lakeside due mainly to the marketing skills of the carp fishing product manufacturers.
How to Use a Bobbin
Setting The Bobbin
Next, you need to set the bobbin. You will want the bobbin to indicate dropbacks and runs, so your bobbin should be set up around three to four inches from your rod, depending on the height of your bite alarm.
Some bobbins can have the tightness adjusted where it clips onto the line. The bobbin needs to be tight enough to stay on the line but be able to fall off when the rod is lifted. Be sure to not tighten the bobbin too tight or you will lift the whole rod pod up.
Delkim night lights have magnets that are attached to the line, which means tightening the bobbin is not necessary.
Korda stow bobbins work in a different way, they clip onto the line itself instead of around the line. This was intentional within its design, the stow bobbin is attached to the line so you can see the bobbin move with the line itself.
With other bobbins other than the stow bobbin, the bobbin clips around the line, so some of the lines will pull through the bobbin before you see any movement in the vertical motion of the bobbin.
How to Sink Fishing Line
There are a few occasions when you won’t want to sink your line, such as for surface float fishing. But, for most other styles of fishing, you will need to make sure your line has sunk properly.
If you are fishing with a slack line, your fishing line could take up to ten minutes to sink depending on what type of fishing line you are using as some sink quicker than others.
- To sink the line, you need to cast out and feel the lead down to the lake bed.
- Then left put the bail arm on and take hold of the line with the other hand and pull the line so there is tension on the line, but not too much as to move the lead.
- Then place the tip of your rod under the water and you will see the line slowly sinking.
- To encourage the line to sink faster, you can pull on the line a little tighter, or pull the rod tip away from the rig ever so slightly until the line disappears under the water.
- Then, pull the rod tip deeper under the water and let go of the line from your other hand.
- Let off the bait arm and walk back to rest your rod on the rod pod or bank stick, then put the bait arm back on.
- Then it’s a case of waiting for around 3-5 minutes before tightening the line and putting on the bobbin.
- If you are fishing slack lines, you don’t tighten the line, you will just put the bobbin on and take up the slack with the reel so it doesn’t fall off of the spool.
How to Fish Semi Slack Lines
To fish semi-slack lines, you will follow steps 1-6 from above, but you won’t need to wait as long for it to sink.
When the full line is just disappearing under the water, walk the rod back to the rod rest and place the rod on the rest.
Then, let the clutch off and turn the spool around to tighten the line so it enters straight into the water without slack.
Clip the bobbin onto the then let a little more line out so you have a small drop on the bobbin.
By fishing a semi-slack line, you will get a faster bite indication, but there is a chance the fish will come into contact with your line.
This method is best suited for casting between 50-80 yards.
How to Fish Tight Lines
Tight lines are best suited to anything over 80 yards as your line should be at a smaller angle, relatively parallel to the lakebed when fishing further out.
When fishing a tight line, you will simply cast the rod out and feel the lead down.
Once the lead hits the lakebed, tighten the line down onto the rod rest giving it barely enough time to let it sink.
Your bobbin will be tight on the line.
When to Strike Using a Bite Alarm
You need to try and resist striking into liners and odd bleeps unless you are sure there is a fish on the line.
When you hear the alarm beep, watch not only the bobbin but also the rod’s tip and where the line enters the water.
A single beep could mean a smart carp have been hooked but knows not to panic and is trying to figure out how to get rid of the hook.
If you see the line moving in a peculiar way where it is entering the water, or the bobbin is moving up and down (even if it is slow), then you should strike the line.
You should also strike if the alarm is going nuts and your reel is peeling off the line at a rate of knots, obviously! Playing with sensitivity control is the key to good bite detection.
Rod Tips Up or Down
The rod tips-up method stems from beach fishing but is not required for the majority of carp fishing.
You will mostly see rod tips up in European rivers when the anglers have cast out a long way and want to keep the line out of the water as much as possible to avoid weeds.
Personally, I would only fish with the rod tips up if there is lots of weed in front of me that I am trying to avoid, but this is very rare. The other reason to fish with the tips up is if there is a gravel bar close by and you are trying to keep the line from draping over the top over the bar, and instead of sitting over the back, then rising towards your rod tip.
I fish with my rod tips around a foot above the water for 99% of my fishing.
Why You Should Always Use a Bite Alarm When Fishing
Night Fishing
The bite alarm will wake you up during your night fishing sessions, which is very helpful for tournament fishing. It will let you know immediately if you have a bite with bright LED lights and a loud audible sound, and it will also allow you to get up and go fishing in the morning.
Bite Indication and Fish Activity
The alarm will notify you whenever fish activity around your bait or hook is detected. One beep can be used to tell if a fish is testing your bait or if it’s just bumped into it. Another sound or LED light will also indicate that a fish has picked up your bait.
See Which Rig Has Been Moved
When activated, the bite alarm will notify you which rod has the fish on it. You can do this by either the tone or the light color of the alarm. During a tournament, I was able to tell which rod had the fish on it by the tone of the alarm.
They Allow You To Relax
While using a bite alarm, you can fish without having to keep checking your line and rod constantly. This is very beneficial for me as it allows me to enjoy the scenery while fishing with others. It’s also easier to fish with other people as I don’t have to keep looking at my line and rod.
Carp Fishing Without Bite Alarms
Carp fishing without bite alarms is possible. When I am on a runs water, I don’t need my alarms switched on, I just use them as rod rests.
This is because I am always watching my rod to see if the line moves, and can hear when the clutch starts to go if I take my eye off the rod.
When feeder fishing and float fishing, bite alarms aren’t used. This is because the float is used as the bite indicator for float fishing, and the rod tip is used as the indicator for feeder fishing.
Other Things to Consider When You Set Up a Bite Alarm.
Some fishing lines react to water and wind movements in different ways. With a higher sensitivity rating, you can use stronger lines to get the correct biting signal.
For heavier lines, such as those used for big specimen carp, choosing a stronger line will allow you to choose a higher sensitivity setting. On the other hand, for lighter lines, such as 6-10lb, you might want to use a lower sensitivity rating to differentiate between bites and other factors.
The lighter range lines are ideal for fishing from a longer distance. Fish bites that are shorter in length will make them less effective using a higher sensitivity setting.
The wind and water movement are the most important factors that can affect the setting of a bite alarm. They can help you find the ideal balance between sensitivity and bite strength.
Magnetic Roller Wheel
A magnetic roller wheel can be used to activate bite alarms. When your line moves, the wheel’s magnets will pass over a sensor in the alarm, which then activates the device. An audible tone and lights are also provided.
Piezo Vibration Sensor
Modern bite alarms use a device known as a piezo vibration sensor, which senses movement. When your line moves, the sensor will turn on and off the alarm.
Most alarms use a magnetic roller wheel. Delkim devices, on the other hand, use a more advanced type of vibration sensor known as the Piezo vibrating sensor.
Removable Snag Ears
Removable snag ears are an add-on to most bite alarms. They allow you to fish at right angles to your rods and prevent your rod from pulling off of the bite alarm.
The Best Bite Alarms – Delkim Bite Alarms
The Delkim uses a combination of sensors and electronics to detect vibrations from the line. These components are combined with a line guide creating a unique and accurate reading of the line’s vibrations. The Delkim’s sophisticated controls and electronics ensure that the information is relayed correctly to the fisherman. They are the definition of modern technology.
The Delkim’s vibration system is different from other bite alarms in that it can detect vibrations without the line moving. This allows it to provide a more accurate reading of the line’s vibrations, especially when fishing for smallmouth bass in winter.
One of the main features that sets the Delkim apart from other bite alarms is its ability to adjust its sensitivity levels to ignore the slow line movement. This eliminates the need for false indications, such as wind gusts.
Stiction, also referred to as static friction, is a phenomenon that occurs when the line stops moving due to its resistance to the start of the movement. This type of resistance can be overcome by Delkim’s vibration system, which then produces a burst of vibrations to ensure that the bite is not missed.
The sensitivity levels of the Delkim depend on the type of fishing activity and the setup of the device. This is why it is important that the user follows the proper instructions when setting up the device.
The Delkim models also have great battery life compared to other fishing alarms, and also come with a waterproof casing. The higher-priced models are also compatible with the Delkim bite alarm receivers.
Sensitivity options, volume adjustment, and an adjustable tone are also features of the Delkim carp fishing bite alarms.
Are You New to Carp Fishing?
When you first get into fishing with a new type of fishing, such as carp, you may not realise that there are certain behaviors that can get in the way of your fellow enthusiasts. Here are a few things to avoid when it comes to using bite alarms.
Before you start fishing, make sure that your fishing bite alarms are off until your rig is ready. This will allow you to set up your equipment without having to deal with the constant beeping.
Don’t turn your alarms on louder than they need to be in order to hear them. I know it may seem like a cool thing to have a big tear off your prized fish with your rig at full volume, but not everyone likes to hear that racket.
You can also use a vibrating receiver to activate your alarms while fishing at night. I’ve used this type of device on a couple of occasions while I was camping. Security quickly showed up when other campers were disturbed during a big evening of fishing.
Don’t forget to bring spare batteries whenever you are fishing.
In Closing
Setting up your alarms and indicators can be a bit challenging, especially if you have a lot of questions. There are lots of advice given by experienced fishermen, but finding the right one can take a lot of patience and effort. This article will give you some ideas on how to start.
Further Reading
Last Updated on March 10, 2026 by Shane
I have made a lot of mistakes during my fishing sessions and don't want you to make the same mistakes. I've learned the hard way over 20 years of fishing most weekends, testing, tweaking, and testing again and now want to help you excel with your carp fishing.
If you need any help, you can reach me at Fishing Again's Facebook page